Automatic investigation
With automatic investigation on, ARGUS runs the same analysis as the Analyze button against qualifying new incidents, with nobody clicking anything.
Configure it under Settings → Investigation.
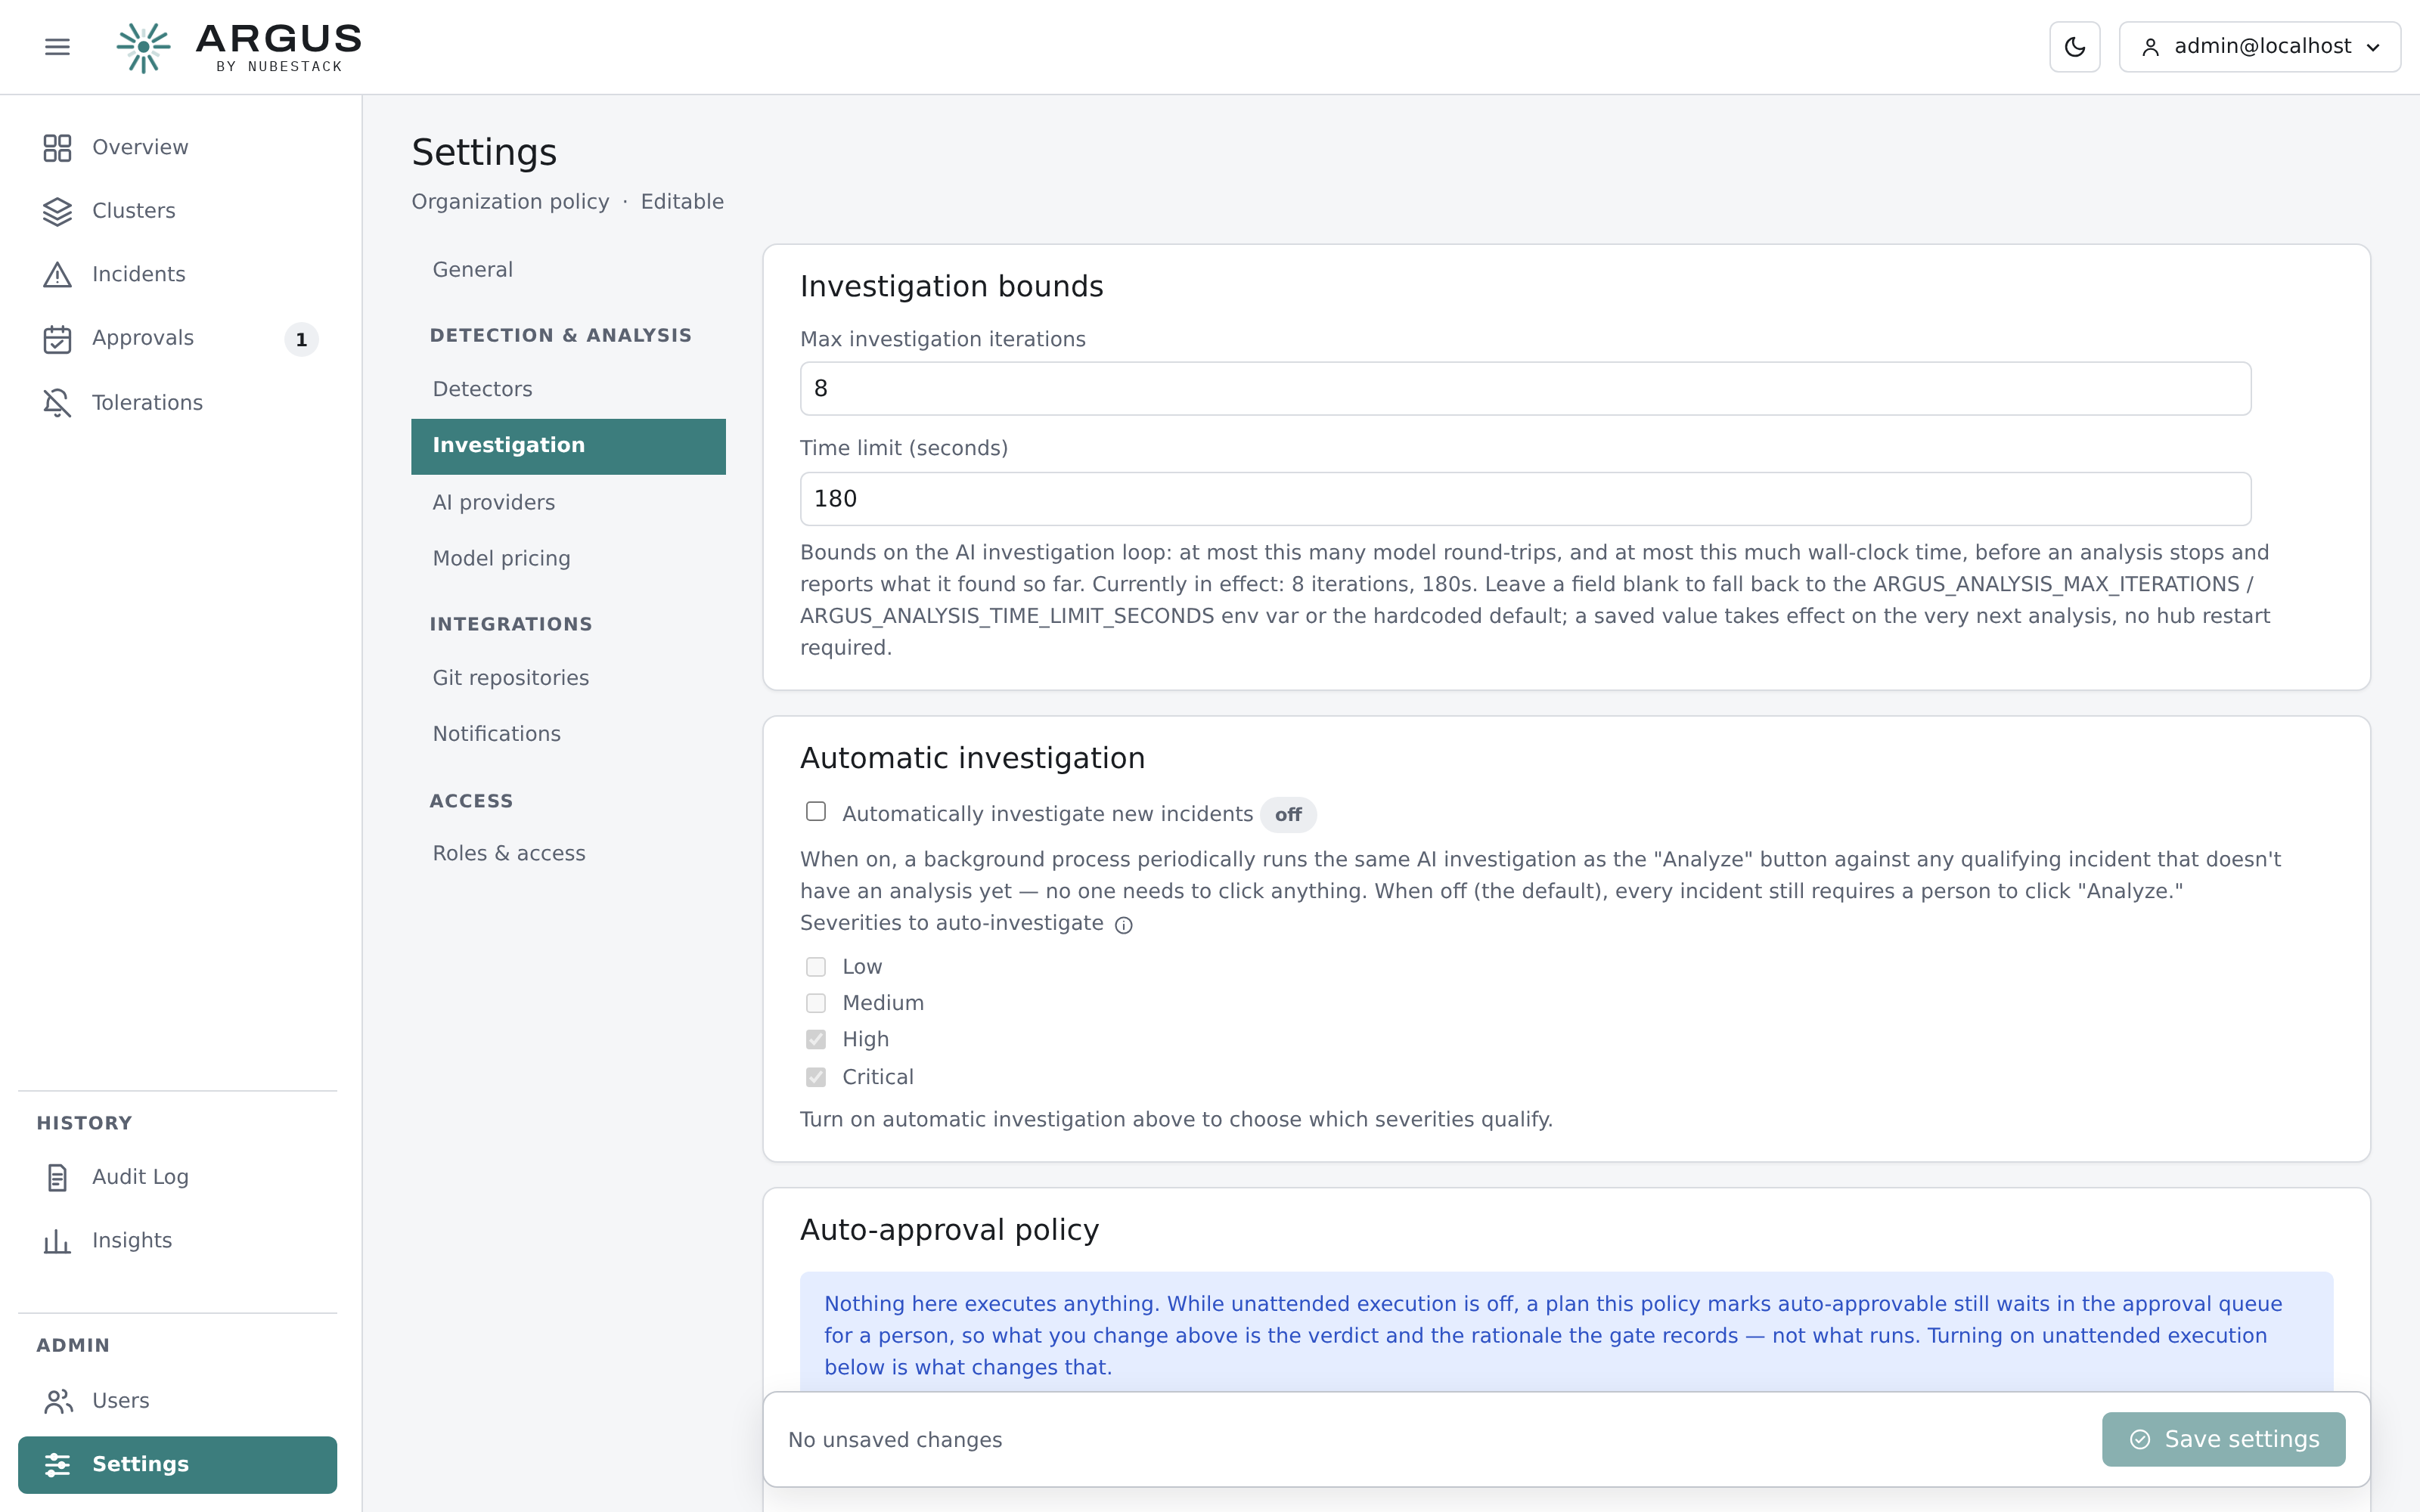
Investigation bounds apply to every analysis. Automatic investigation is off by default; when on, you choose which severities qualify.
What it changes
Off, every incident waits for a person to click Analyze. On, a background process picks up qualifying incidents that have no analysis yet.
Each incident is investigated automatically at most once. If that investigation reaches no conclusion, the incident waits for a person rather than being retried indefinitely.
Choosing severities
Nominate which severities qualify. Starting with high and critical only is a reasonable first setting: it keeps cost predictable and means the queue you look at has already been triaged.
Cost control
Automatic investigation is the setting that can spend money without anyone asking it to. Three controls bound it:
| Control | Effect |
|---|---|
| Investigation bounds | Caps model round-trips and wall-clock time per analysis |
| Severity selection | Limits which incidents qualify at all |
| Daily spend ceiling | Stops automatic investigation for the rest of the day when reached |
The spend ceiling needs a price table configured under Settings → Model pricing to mean anything — without prices, recorded cost is an honest zero and a ceiling has nothing to compare against.
A manual Analyze click is a deliberate, bounded human action and is never blocked by the ceiling.
Subscription-billed providers
An agent-CLI provider authenticated by subscription records cost on a notional basis that the ceiling does not count. With that provider active, real activity cannot breach the ceiling however it is set.
Before enabling it
- Configure and test a provider.
- Configure prices and a daily ceiling.
- Set investigation bounds you are comfortable with.
- Leave storm protection on.
- Try it on a non-production cluster first.